Custom APIs
So far, every API call has hit the CRUD endpoints that Shesha generates automatically for each entity. Auto-generated CRUD is enough for a lot of use cases, but real applications usually have rules that go beyond "read this row" or "write this row". This step shows how to add a custom application service that enforces a business rule before performing an action.
The example: a member's MembershipStatus should not be flipped to Active just by toggling a dropdown. The rule is that the member must have paid at least R100 in total before activation. You will build a custom endpoint that enforces this rule, then wire a button on the details view to call it.
Create the App Service
In a Shesha project, custom logic lives in an application service in the Application project. The service inherits from SheshaAppServiceBase, which gives it access to Shesha's helpers, dynamic DTO mapping, and Abp's repository pattern.
1. Add the Service Class
- Navigate to
Shesha.Membership.Application. - Create a new folder called
Services. - Right-click the folder and choose Add > Class.
- Name the class
MemberAppService.cs.
Example - MemberAppService with an ActivateMembership endpoint:
using Abp.Domain.Repositories;
using Abp.UI;
using Microsoft.AspNetCore.Mvc;
using Shesha.DynamicEntities.Dtos;
using Shesha.Membership.Domain.Domain;
using Shesha.Membership.Domain.Enums;
using System;
using System.Threading.Tasks;

namespace Shesha.Membership.Application.Services
{
    public class MemberAppService : SheshaAppServiceBase
    {
        private readonly IRepository<Member, Guid> _memberRepository;
        private readonly IRepository<MembershipPayment, Guid> _membershipPaymentRepository;

        public MemberAppService(
            IRepository<Member, Guid> memberRepository,
            IRepository<MembershipPayment, Guid> membershipPaymentRepository)
        {
            _memberRepository = memberRepository;
            _membershipPaymentRepository = membershipPaymentRepository;
        }

        [HttpPut, Route("[action]/{memberId}")]
        public async Task<DynamicDto<Member, Guid>> ActivateMembership(Guid memberId)
        {
            var member = await _memberRepository.GetAsync(memberId);
            var payments = await _membershipPaymentRepository
                .GetAllListAsync(p => p.Member.Id == memberId);

            if (payments.Count == 0)
                throw new UserFriendlyException("There are no payments made");

            double totalAmount = 0;
            payments.ForEach(p => totalAmount += p.Amount);

            if (totalAmount < 100)
                throw new UserFriendlyException("Payments made are less than 100");

            member.MembershipStatus = RefListMembershipStatuses.Active;
            var updatedMember = await _memberRepository.UpdateAsync(member);

            return await MapToDynamicDtoAsync<Member, Guid>(updatedMember);
        }
    }
}
For background on DynamicDto and how Shesha's automatic DTO mapping works, see Custom APIs.
UserFriendlyException is an Abp exception that the framework translates into a clean error message in the API response. The frontend can then surface that message directly to the end user. Use it for any validation or rule-violation error that the user should see.
2. Test in Swagger
- Run the application (Debug > Start Debugging or F5).
- Search Swagger for
ActivateMembership. - The endpoint should appear under the auto-registered routes.
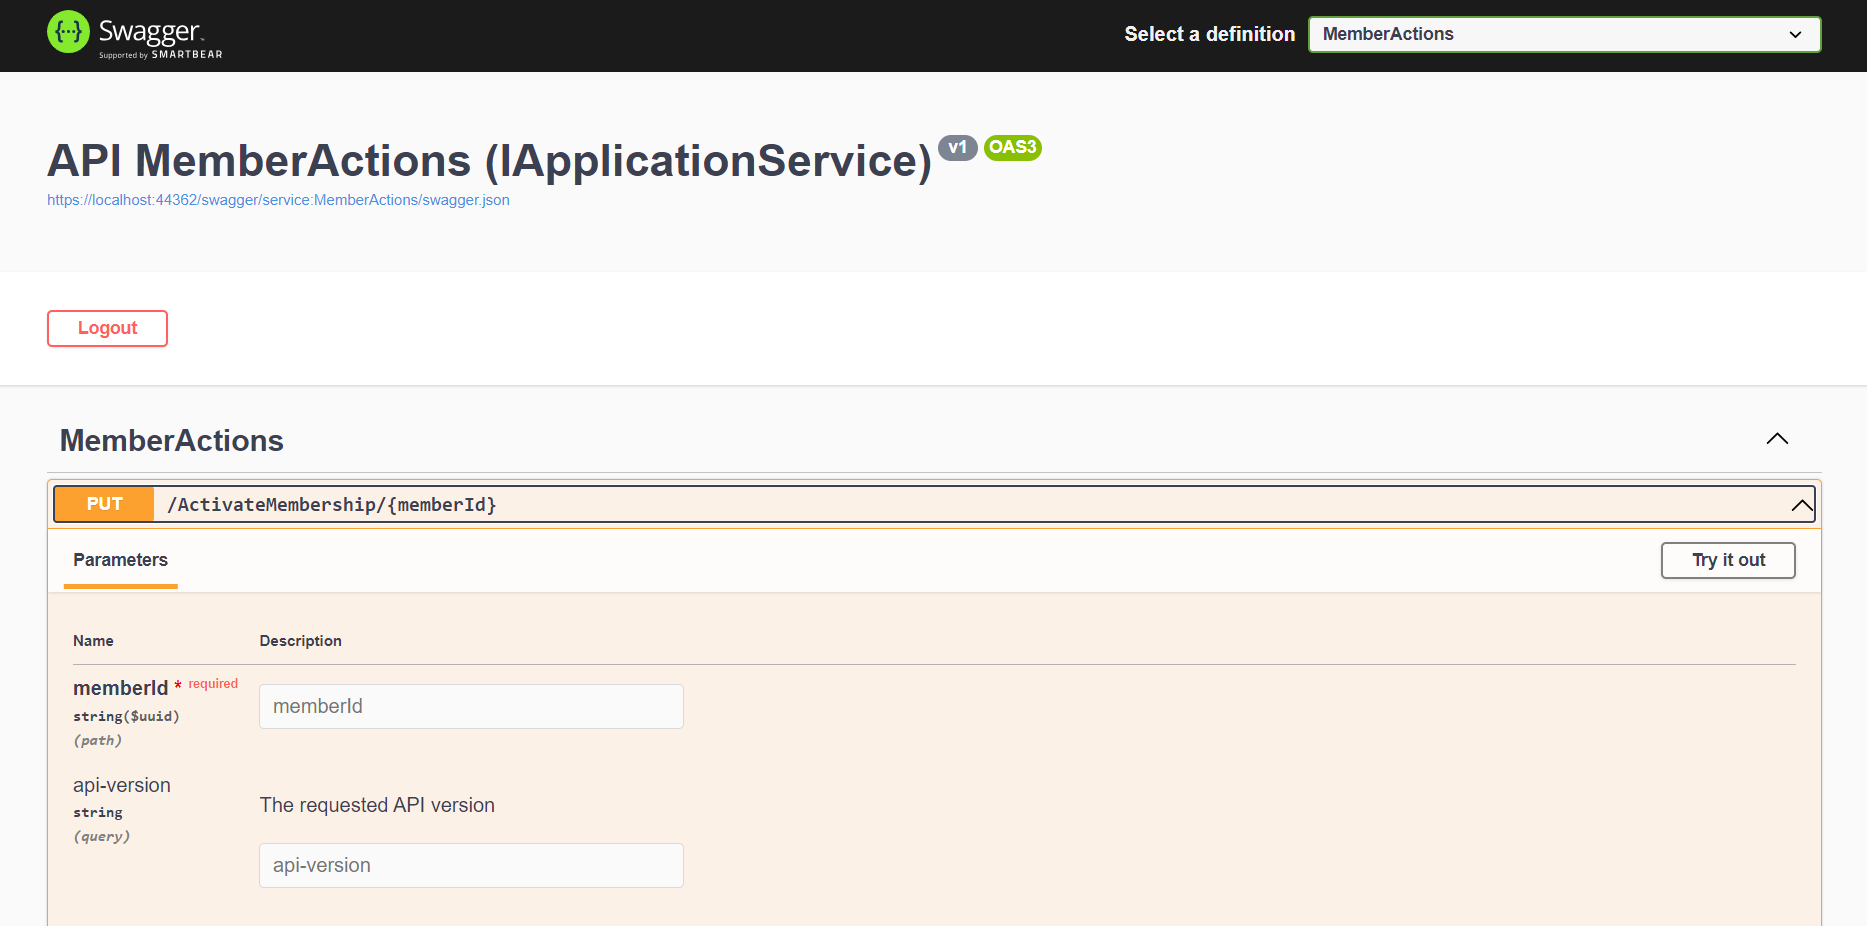
You do not need to add the service to a DI container or register it manually. Shesha discovers any class that inherits from SheshaAppServiceBase and exposes its public methods as endpoints.
Add an Action Button to the Details View
Now wire a button on the member's details view that calls the new endpoint.
1. Open the Form Designer
Open the member-details form designer.
2. Configure the Button
- Select the Button Group component and click Customize Button Group.
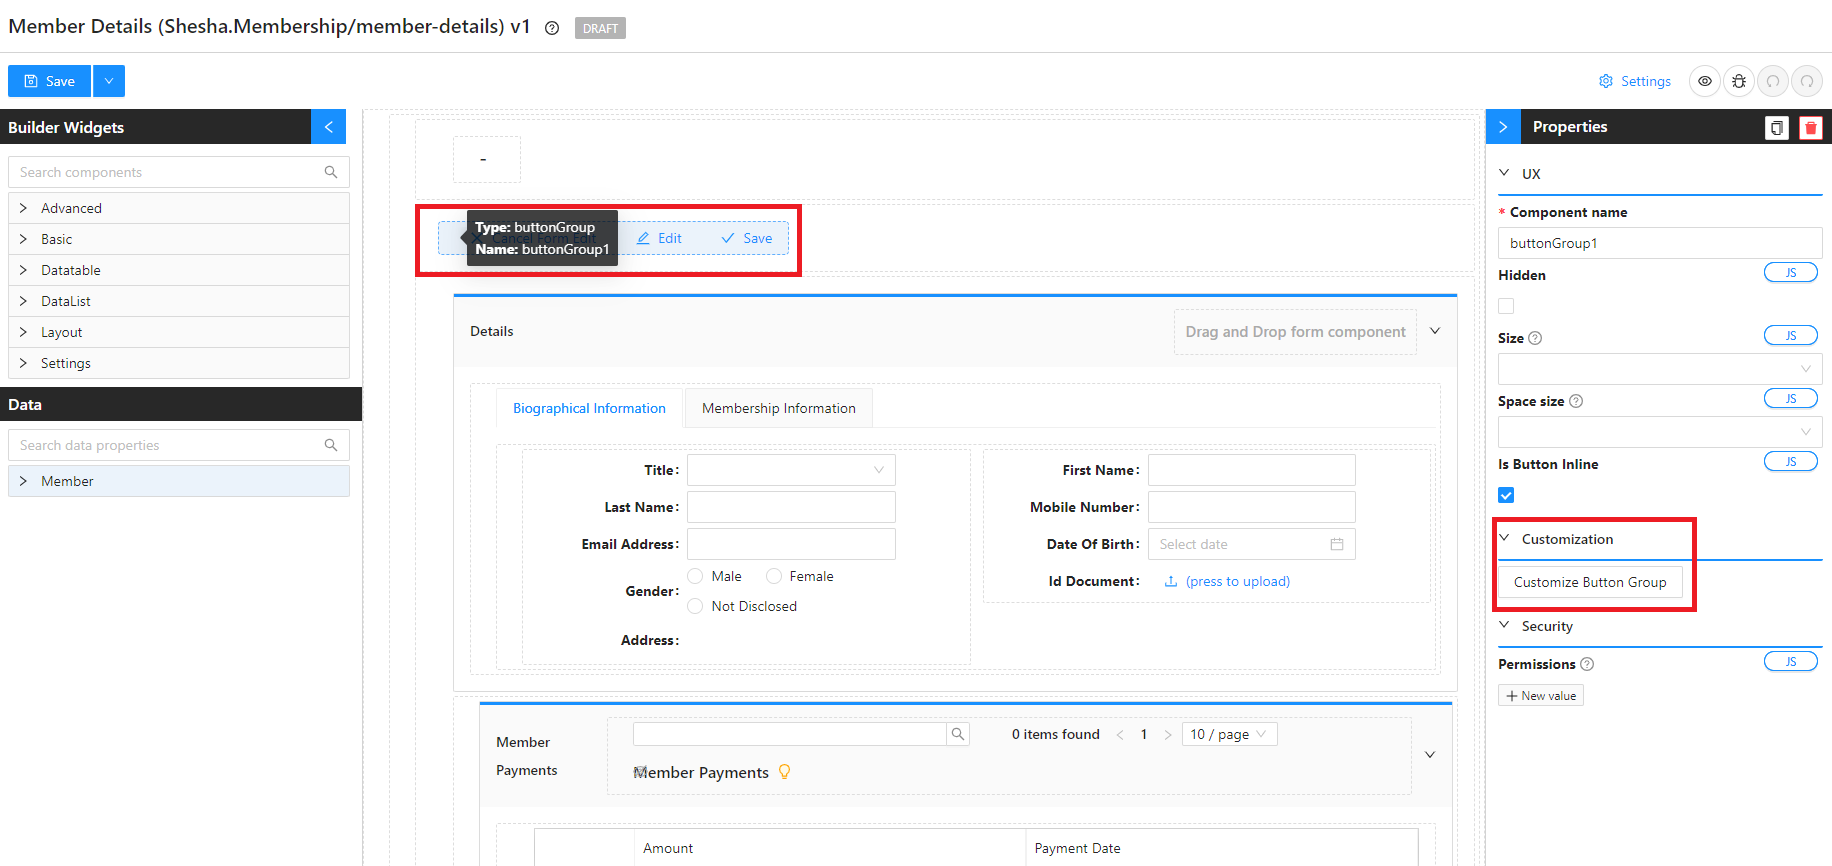
- Click Add New Item and configure:
| Field | Value |
|---|---|
Label | Activate Membership |
Button Type | Link |
Action Name | Common > Execute Script |
Handle Success | Designer Form > Refresh |
Form type to use: Button on the member-details (details view) form.
Example - Activate Membership button script:
const PATH = `/ActivateMembership/${data.id}`;

try {
  await http.put(PATH);
} catch (e) {
  message.error(
    `Failed to Activate Membership: ${e?.response?.data?.error?.message ?? e}`,
    10
  );
  throw e;
}
If the API call fails (for example because the activation rule is violated), you want the form to surface the error rather than swallow it silently. Always wrap http.* calls in try/catch and show the error message with message.error(...).
- Click Save on the Customize Button Group modal.
- Save the form.
Test the Activation Rule
- From the main menu, navigate to the members-table and refresh.
- Drill into the details view of a member.
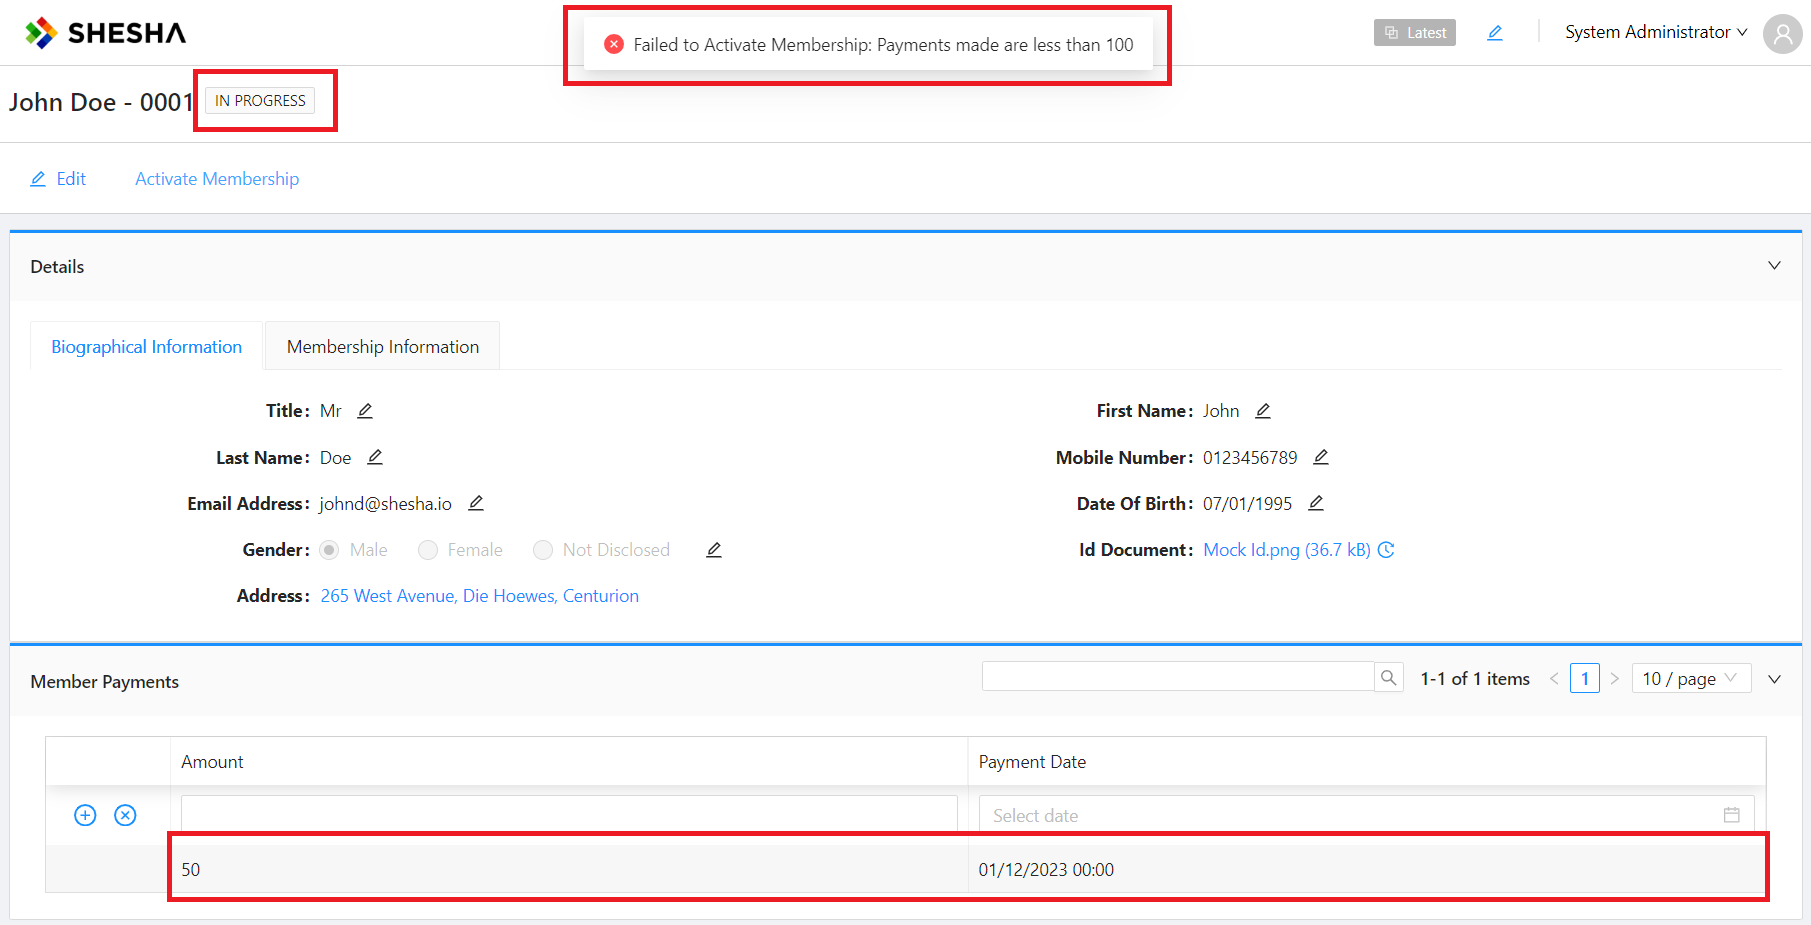
Case 1: Not Enough Payments
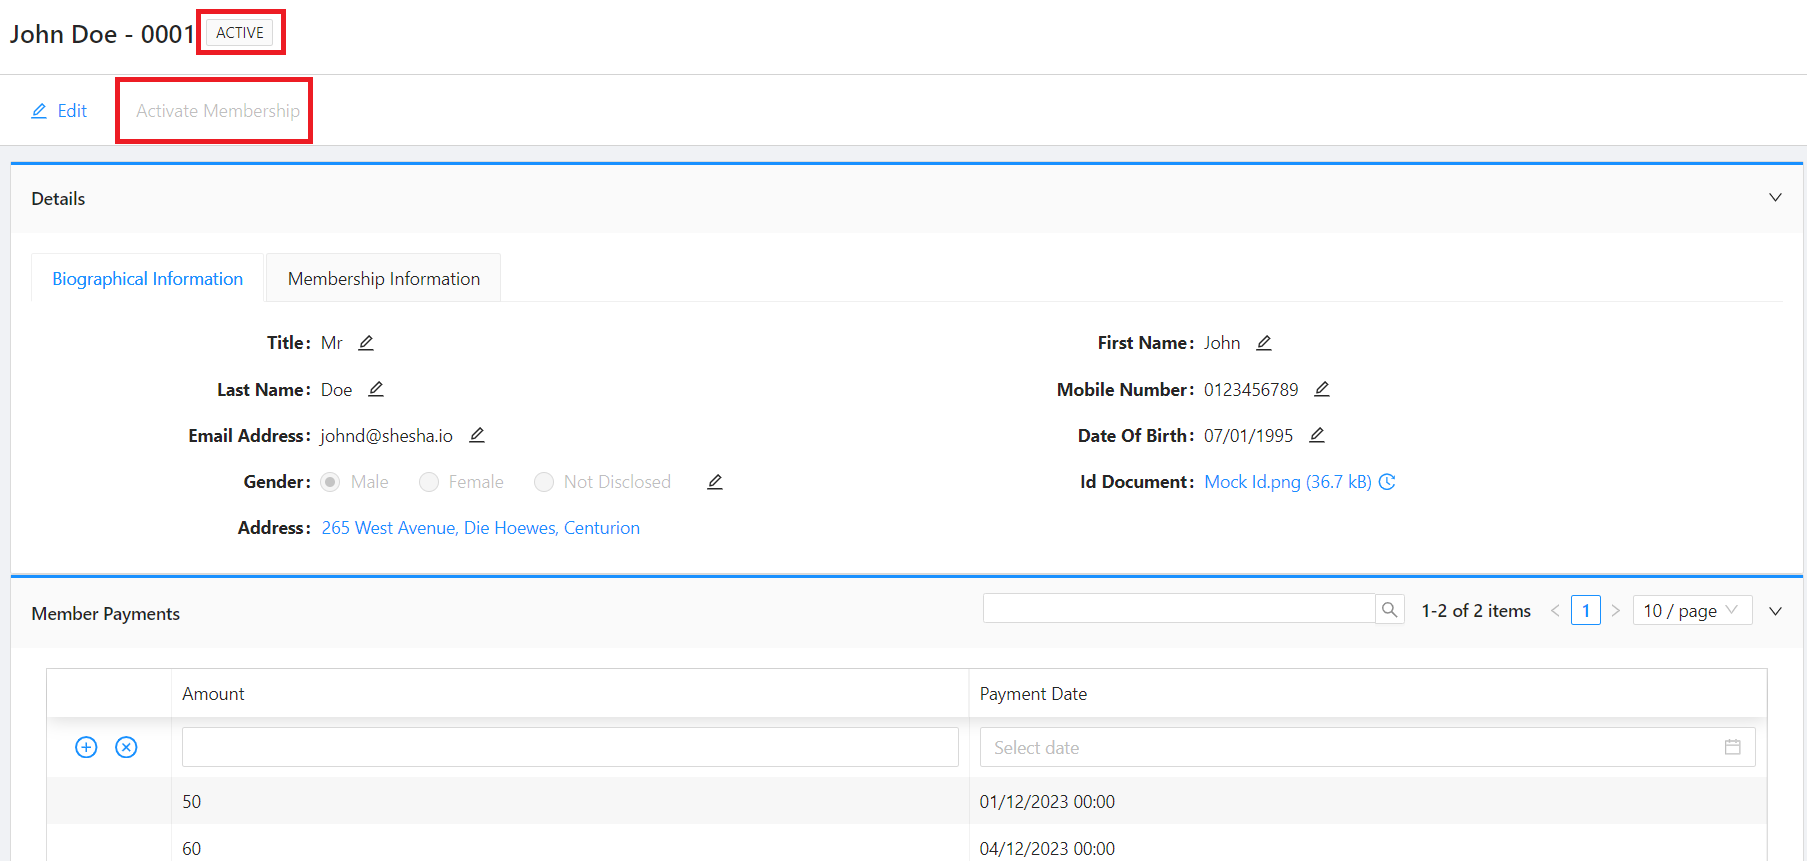
For the purposes of this tutorial, this member has only made a payment of R50, which is half of the activation amount. If the member's total payments are below R100, clicking Activate Membership shows the UserFriendlyException message.
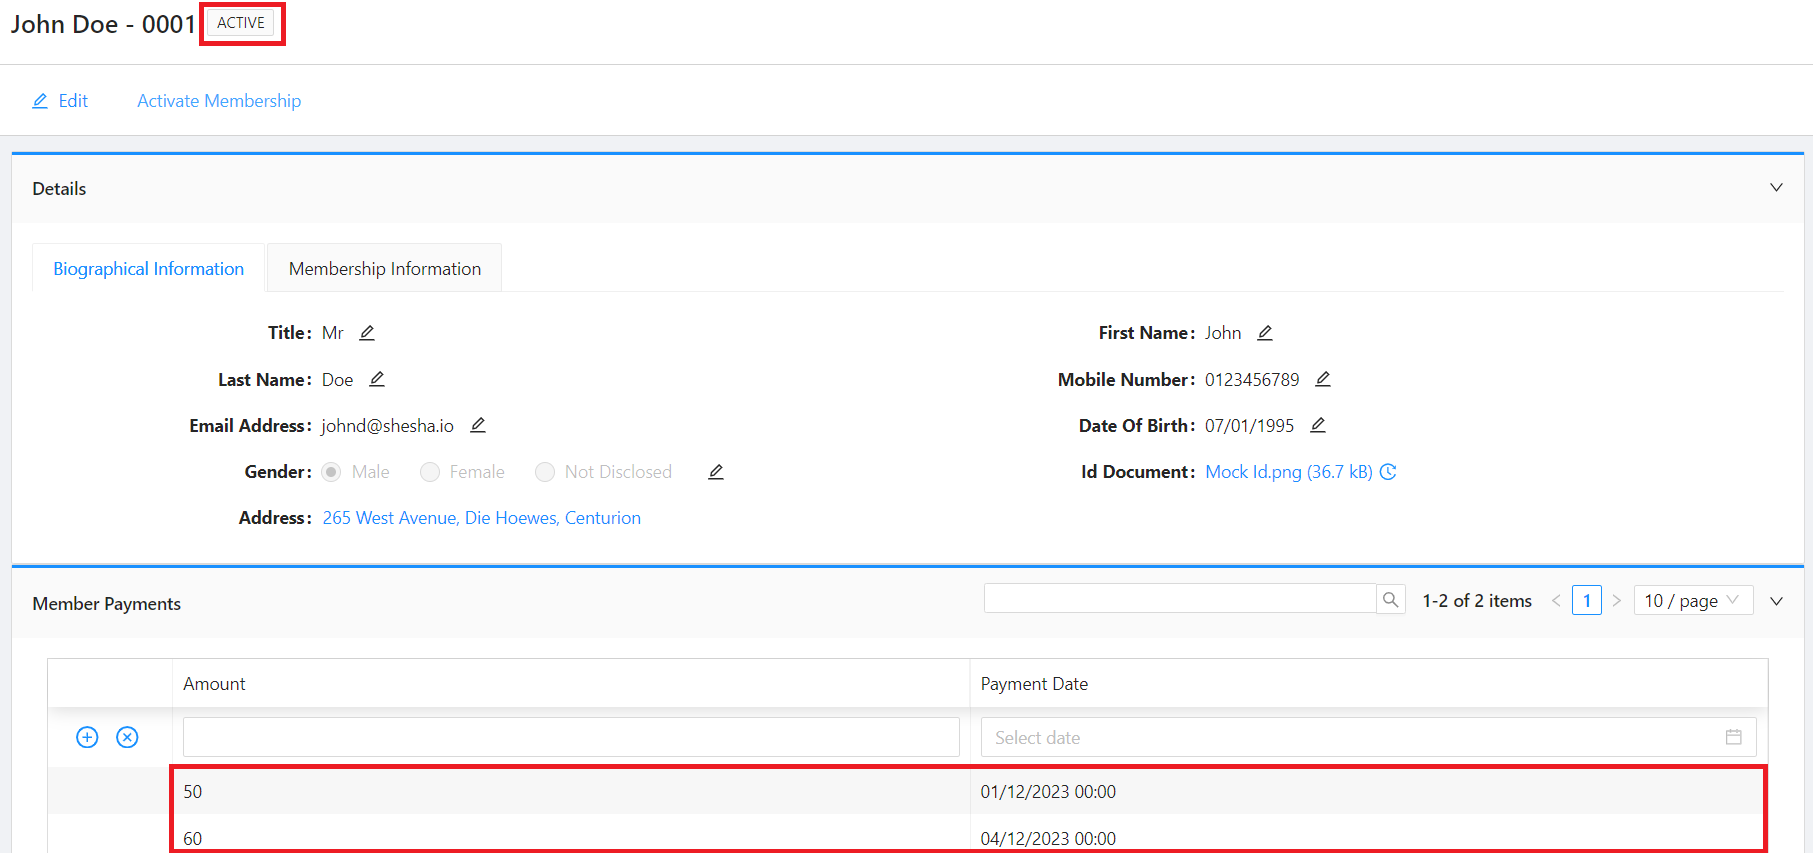
Case 2: Enough Payments
Add a Membership Payment of R60 (using the inline-editing flow from the previous step). The member now has R50 + R60 = R110 in total, which meets the R100 threshold. Click Activate Membership - the status switches to Active.
Disable the Button for Already-Active Members
Once a member is active, the Activate Membership button is no longer relevant. Disable it conditionally based on the current status.
- Open the member-details form designer.
- Select the Button Group component and click Customize Button Group.
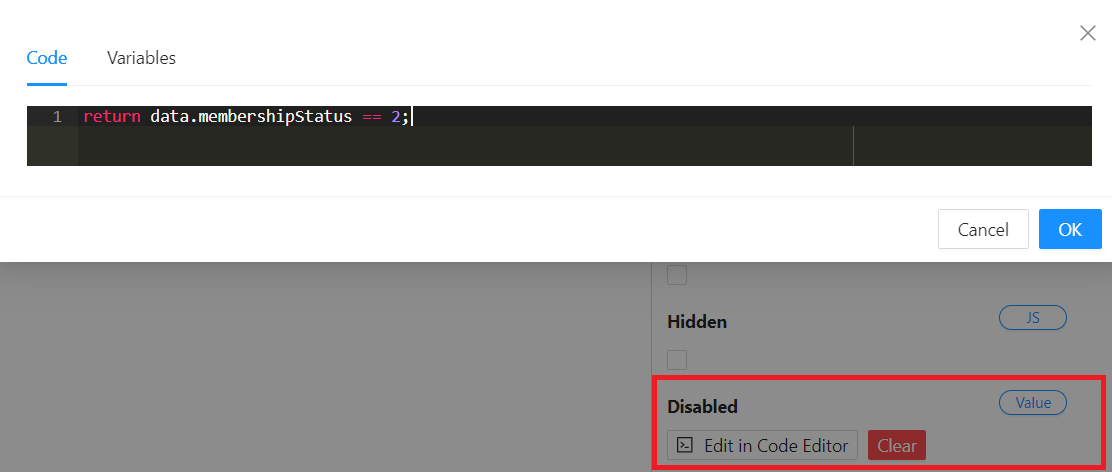
- On the Activate Membership button, set Disabled to JS and use:
Form type to use: Disabled (JS) on a Button inside the member-details form.
Example - Disable the button when the membership is already active:
return data.membershipStatus == 2;
Reference list values are stored as integers on the backend. 2 is the Active value in RefListMembershipStatuses (verified from the enum in the previous step). Always use the integer value from the enum rather than the label - the label can change without affecting the integer.
- Click Save on the Customize Button Group modal.
- Save the form.
You're Done
You have now built a complete Shesha application end-to-end: a custom domain model, a child table, a custom API enforcing a business rule, and a UI that surfaces all of it. From here, dive into the Fundamentals section to understand the concepts at a deeper level, or jump straight to Front-End Basics to see what else the form designer can do.