JSON Entities to Form
A JsonEntity is a Shesha concept that lets you store a richly typed object inside a single JSON column on a parent entity, without giving that object its own database table. JSON entities are useful for embedded value objects (an address inside a person, a configuration block inside a workflow step) and for polymorphic content where different shapes can be stored under the same field.
This guide shows how to bind a Shesha form directly to a JsonEntity property, and how to switch between different concrete types of JsonEntity at runtime using a SubForm and a Dropdown.
Configure the Back-End
The host entity has a regular property of type JsonEntity. The polymorphic content lives in subclasses of JsonEntity.
Example - The host entity with a JsonEntity property:
[Table("SheshFunctionalTests_TestClasses")]
[Entity(TypeShortAlias = "Boxfusion.SheshFunctionalTests.Domain.TestClass")]
public class TestClass : Entity<Guid>
{
    public virtual string TestProp { get; set; }

    public virtual JsonEntity JsonProp { get; set; }
}
The JsonProp column stores whichever concrete JsonEntity subclass you assign to it.
Example - Several JsonEntity subclasses that the host can hold:
public class JsonHouse : JsonEntity
{
    public Address Address { get; set; }
    public string Name { get; set; }
    public Person Person { get; set; }
}

public class JsonCar : JsonEntity
{
    public virtual string Make { get; set; }
    public virtual string Model { get; set; }
    public virtual string VinNumber { get; set; }
    public virtual IList<JsonWheel> Wheels { get; set; }
}

public class JsonWheel : JsonEntity
{
    public virtual string Type { get; set; }
    public virtual long Size { get; set; }

    [SaveAsJson]
    public virtual IList<JsonSpoke> Spoke { get; set; }
}

public class JsonSpoke
{
    public virtual double Length { get; set; }
    public virtual string Material { get; set; }
    public virtual double Thickness { get; set; }
}

public class TestJsonEntity : JsonEntity
{
    public virtual Organisation SomeOrganisation { get; set; }
    public virtual string SomeName { get; set; }
}
[SaveAsJson] on a property tells the ORM to persist that property as JSON inside the parent JSON column rather than as its own column.
That is everything needed on the back-end - no tables, no migrations, no custom DTOs.
Configure the Front-End
You need two kinds of form:
- One detail form per
JsonEntitysubclass (one forJsonHouse, one forJsonCar, one forJsonWheel, and so on). - One host form for the parent entity that contains the
JsonEntityproperty.
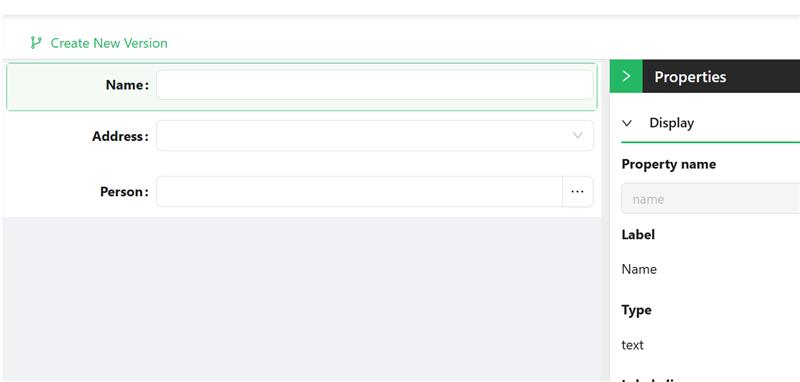
Detail Forms
Create one form for each concrete JsonEntity subclass. Each form is bound to its own type and contains the fields specific to that type.
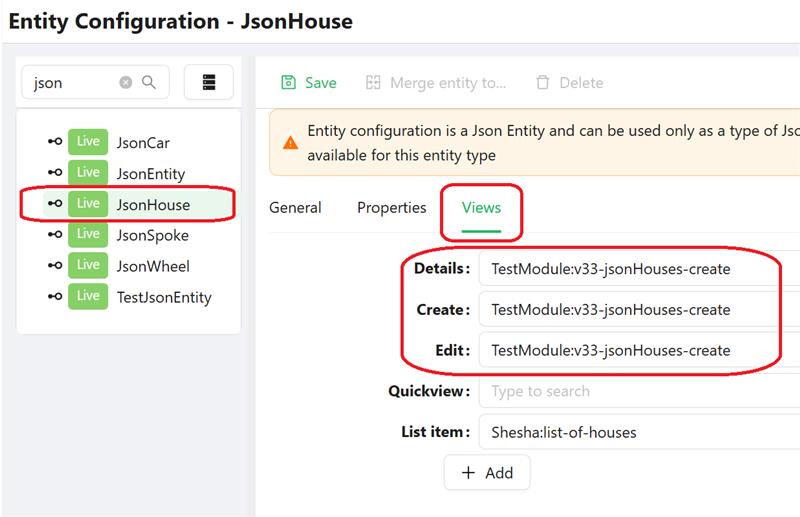
Once the detail forms exist, register them in the Entity Configurator under Views so the framework knows which form to use for each JsonEntity type.
Host Form
Now build the host form for the parent entity (TestClass in this example). It needs three components:
| Component | Purpose |
|---|---|
TextField | Bound to the parent's plain TestProp field |
Dropdown | Lets the user pick which JsonEntity type to store in JsonProp |
SubForm | Renders the detail form for the selected JsonEntity type |
Configure the Dropdown
The Dropdown is bound to the special _className discriminator on the JSON property, so picking a value tells the framework which subclass is stored.
- Property name:
jsonProp._className - DataSource type:
Values - Values: for each option, the Label is the friendly type name and the Value is the fully qualified class name.

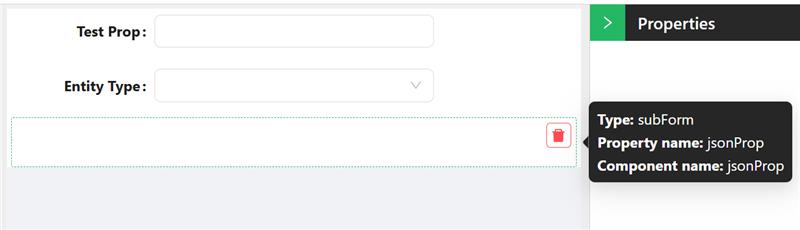
Configure the SubForm
The SubForm is bound to the JSON property itself, with Dynamic form selection so the framework picks the right detail form based on _className.
- Property name:
jsonProp(binds the SubForm to the JsonEntity data) - Form selection mode:
Dynamic - Form type:
Create
When the user picks a value from the Dropdown, the _className field on jsonProp updates. The SubForm sees this change and swaps to the matching detail form automatically.
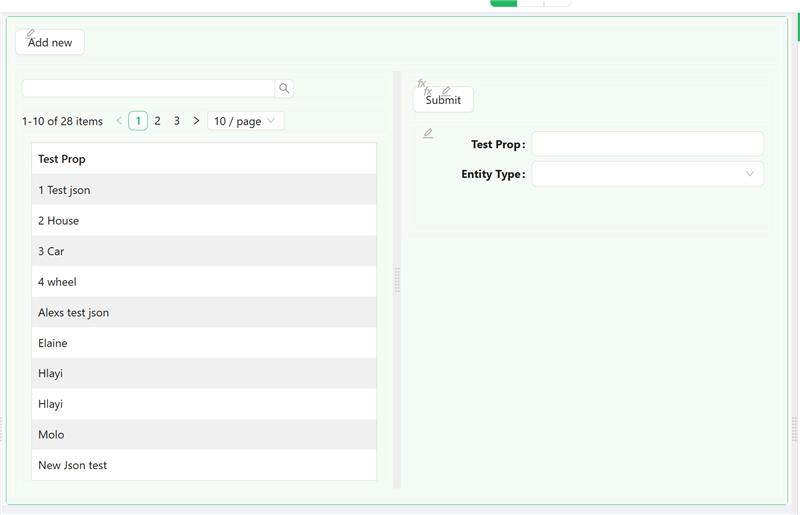
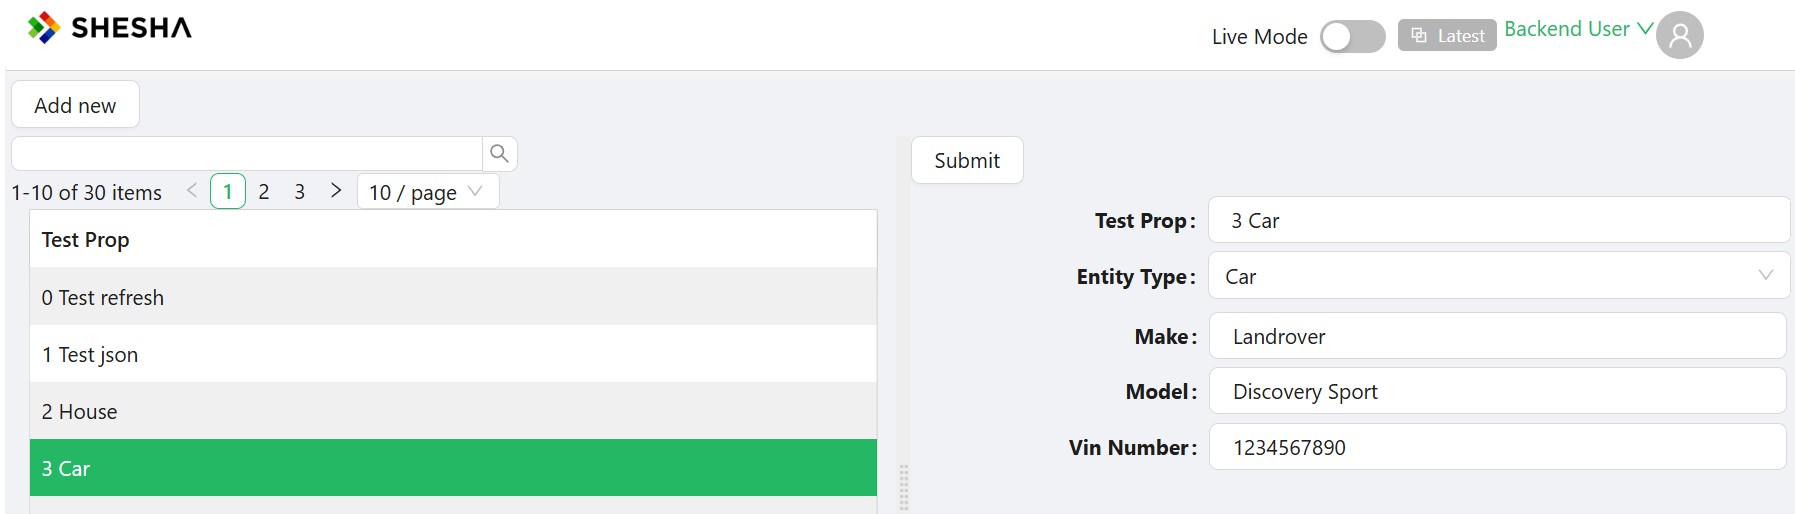
Adding a List View
To list and edit existing records, build a separate list/detail form with the following pattern:
- An Add button that opens a dialog using the host form above (the standard pattern for any new-record dialog).
- A DataTable bound to the host entity (the standard pattern for any entity list).
- A SubForm that displays the selected row's
JsonEntitydata.

The SubForm needs to fetch the JSON content for the currently selected row, so configure its Query Params to pass the selected row's Id:

The PUT URL for saving back follows the same structure:

- A Submit button with Action configuration set to
subForm: Update form data.
When the user picks a row in the table, contexts.DataTableContext1.selectedRow updates. This changes the SubForm's Query Params, which loads the JSON data for the selected TestClass. The SubForm reads _className off the loaded data and swaps to the matching detail form automatically.
The _className discriminator is what makes polymorphism over JSON work at runtime. As long as every detail form is bound to its concrete JsonEntity subclass and registered in the Entity Configurator, the SubForm can swap between them without any custom code on the host form.