Creating a New Front End Application in Shesha
This guide walks you through the process of creating a new front end application in your Shesha project.
Table of Contents
- Overview
- Step 1: Duplicate the Frontend Folder
- Step 2: Update Package Configuration
- Step 3: Create Backend Migration for Application Key
- Step 4: Update Application Provider Configuration
- Step 5: Install Dependencies and Test
Overview
Shesha allows you to create multiple frontend applications within a single project. Each frontend application can serve different purposes (e.g., public portal, customer portal, admin portal).
Common use cases:
- Creating a public-facing portal separate from the admin interface
- Setting up a customer/client portal
- Building specialized interfaces for different user roles
Shesha does not currently ship a generator or CLI command for scaffolding a new frontend application. Duplicating the existing frontend folder, as described below, is a workaround that produces a working second Next.js app - it isn't an officially packaged workflow, so treat each step as something to verify against your own project structure.
Step 1: Duplicate the Frontend Folder
1.1 Copy the Folder
The Shesha starter's frontend project lives in a folder named frontend (in the shesha-starter template this is frontend/, containing src/app, package.json, and so on). Navigate to your project root directory and duplicate it:
# In your project root directory
cp -r frontend publicportal
Or use your file explorer to copy and paste the folder.
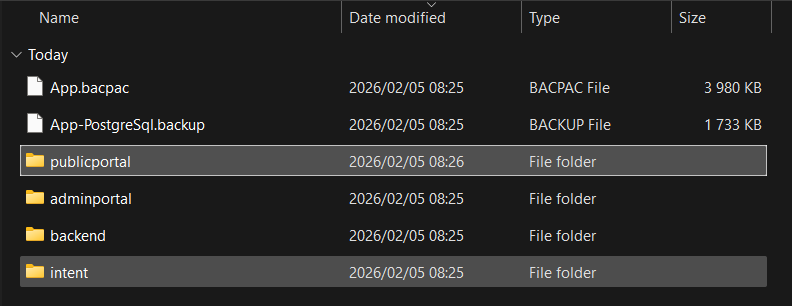
1.2 Verify the Folder Structure
After duplication, your project structure should look like this:
Sample.App/
├── frontend/
├── publicportal/          ← New folder
├── backend/
├── intent/
└── docs/
Choose a meaningful name for your new application folder (e.g., customerportal, publicportal, vendorportal) that reflects its purpose.
Step 2: Update Package Configuration
2.1 Update package.json
Open publicportal/package.json and update the name field:
Before:
{
  "name": "@shesha-io/starter",
  "version": "0.0.1",
  "private": false,
  ...
}
After:
{
  "name": "@shesha-io/sample-publicportal",
  "version": "0.0.1",
  "private": false,
  ...
}
2.2 Update Layout Configuration (Optional)
You can customize the layout settings for your new portal by editing the layout configuration file.
Location: publicportal/src/app-constants/layout.ts
This file contains constants that control your application's layout mode, header, login page, and footer. You can modify these existing constants to customize your portal:
Available constants to update:
/** The layout mode to use throughout the application */
export const LAYOUT_MODE: LayoutMode = "defaultLayout";
// Options: 'defaultLayout' (sidebar) or 'horizontalLayout' (top navigation)

/** The header form to display in the layout */
export const ACTIVE_HEADER: FormFullName = HEADER_CONFIGURATION;
// Options: HEADER_CONFIGURATION (admin), HEADER_PUB_PORTAL_CONFIGURATION (public), or custom form

/** The login form to display on the login page */
export const ACTIVE_LOGIN: FormFullName = LOGIN_CONFIGURATION;
// Options: LOGIN_CONFIGURATION (admin), LOGIN_PUB_PORTAL_CONFIGURATION (public), or custom form

/** The footer form to display in the layout */
export const ACTIVE_FOOTER: FormFullName = null;
// Options: null (no footer), FOOTER_CONFIGURATION (standard), or custom form
HEADER_CONFIGURATION- Standard admin headerHEADER_PUB_PORTAL_CONFIGURATION- Public portal headerLOGIN_CONFIGURATION- Standard admin loginLOGIN_PUB_PORTAL_CONFIGURATION- Public portal loginFOOTER_CONFIGURATION- Standard footer
These constants are exported from @shesha-io/reactjs (src/components/mainLayout/constant.ts).
Example customization:
Option 1: Use Shesha's built-in public portal forms
Import the public portal configurations at the top of the file:
import {
  LayoutMode,
  FormFullName,
  HEADER_PUB_PORTAL_CONFIGURATION,
  LOGIN_PUB_PORTAL_CONFIGURATION,
  FOOTER_CONFIGURATION,
} from "@shesha-io/reactjs";
Then update the constants:
export const LAYOUT_MODE: LayoutMode = "horizontalLayout"; // Changed from 'defaultLayout'
export const ACTIVE_HEADER: FormFullName = HEADER_PUB_PORTAL_CONFIGURATION;
export const ACTIVE_LOGIN: FormFullName = LOGIN_PUB_PORTAL_CONFIGURATION;
export const ACTIVE_FOOTER: FormFullName = FOOTER_CONFIGURATION;
Option 2: Use custom forms you created in the Forms Designer
export const ACTIVE_HEADER: FormFullName = {
  module: "Shesha",
  name: "custom-public-header",
};
export const ACTIVE_LOGIN: FormFullName = {
  module: "Shesha",
  name: "custom-public-login",
};
export const ACTIVE_FOOTER: FormFullName = {
  module: "Shesha",
  name: "custom-public-footer",
};
These settings are optional and only need to be changed if you want to customize the look and feel of your new portal to differentiate it from the admin portal.
To use custom forms, create them in the Forms Designer first, then update these constants to reference your custom form using the format: {module: 'YourModule', name: 'form-name'}.
Step 3: Create Backend Migration for Application Key
3.1 Understanding Application Keys
Each Shesha frontend application needs to be registered in the backend database with a unique application key. This key is used to:
- Identify the application in the system
- Associate forms and configurations with the specific frontend
- Manage permissions and access control
3.2 Create the Migration File
In the backend project, create a new migration file in the Migrations folder:
Location: backend/src/Module/Sample.App.Domain/Migrations/
File naming convention: M[YYYYMMDDHHMMSSff].cs
Example: M20260205160000.cs
3.3 Migration Template
The FrontEndApp entity (Shesha.Domain.FrontEndApp) is mapped to the schema-qualified, snake_case table frwk.front_end_apps ([Table("front_end_apps", Schema = "frwk")], [SnakeCaseNaming]). Here's a migration template that inserts a new row into it:
using FluentMigrator;
using Shesha.FluentMigrator;

namespace Sample.App.Domain.Migrations
{
    [Migration(20260205085000)]
    public class M20260205085000 : OneWayMigration
    {
        /// <summary>
        /// Adds new Public Portal frontend application
        /// </summary>
        public override void Up()
        {
            Execute.Sql(@"
                IF NOT EXISTS (
                    SELECT 1
                    FROM [frwk].[front_end_apps]
                    WHERE [app_key] = 'sample-publicportal'
                )
                BEGIN
                    INSERT INTO [frwk].[front_end_apps]
                    (
                        [id],
                        [creation_time],
                        [creator_user_id],
                        [is_deleted],
                        [tenant_id],
                        [name],
                        [description],
                        [app_key]
                    )
                    VALUES
                    (
                        NEWID(),
                        GETDATE(),
                        NULL,
                        0,
                        NULL,
                        'Sample Public Portal',
                        'Sample public-facing portal application',
                        'sample-publicportal'
                    )
                END
            ");
        }
    }
}
This raw-SQL example targets SQL Server only (NEWID()). If your project also supports PostgreSQL, branch the statement with IfDatabase("SqlServer") / IfDatabase("PostgreSql") (using gen_random_uuid() for the id on PostgreSQL), as the framework's own migrations that seed this table do.
3.4 Key Points About the Migration
- Migration Number: Use a timestamp-based number (YYYYMMDDHHmmssff) to ensure unique migration ordering
- AppKey: Use lowercase, no spaces (e.g.,
sample-publicportal,customerportal) - GUID Generation: The
NEWID()function generates a unique identifier in SQL Server
3.5 Apply the Migration
After creating the migration file in backend/src/Module/Sample.App.Domain/Migrations/:
# Navigate to the backend directory
cd backend

# Build the solution
dotnet build

# Run the application - FluentMigrator migrations run automatically on startup
dotnet run --project src/Sample.App.Web.Host
The migration will run automatically when the backend starts. Ensure your database connection string is correctly configured in appsettings.json.
Step 4: Update Application Provider Configuration
4.1 Update the ShaApplicationProvider
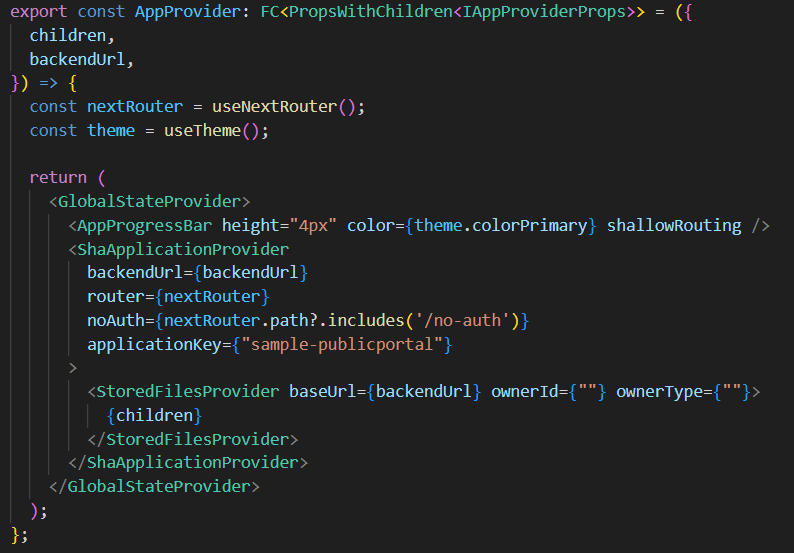
After creating the migration, you must update the application provider in your new portal to specify the application key. This is a required step.
Location: publicportal/src/app/app-provider.tsx
StoredFilesProvider renamedIn v0.46 the framework renamed StoredFilesProvider to AttachmentsEditorProvider and removed its baseUrl prop. The code below still uses the older name, which matches the @shesha-io/reactjs release the current starter project depends on. Check which version your project uses and pick the matching name.
Before:
export const AppProvider: FC<PropsWithChildren<IAppProviderProps>> = ({
  children,
  backendUrl,
}) => {
  const nextRouter = useNextRouter();
  const theme = useTheme();

  return (
    <GlobalStateProvider>
      <AppProgressBar height="4px" color={theme.colorPrimary} shallowRouting />
      <ShaApplicationProvider
        backendUrl={backendUrl}
        router={nextRouter}
        noAuth={nextRouter.path?.includes('/no-auth')}
      >
        <StoredFilesProvider baseUrl={backendUrl} ownerId={""} ownerType={""}>
          {children}
        </StoredFilesProvider>
      </ShaApplicationProvider>
    </GlobalStateProvider>
  );
};
After:
export const AppProvider: FC<PropsWithChildren<IAppProviderProps>> = ({
  children,
  backendUrl,
}) => {
  const nextRouter = useNextRouter();
  const theme = useTheme();

  return (
    <GlobalStateProvider>
      <AppProgressBar height="4px" color={theme.colorPrimary} shallowRouting />
      <ShaApplicationProvider
        backendUrl={backendUrl}
        router={nextRouter}
        applicationKey={"sample-publicportal"}  {/* ADD THIS LINE */}
        noAuth={nextRouter.path?.includes('/no-auth')}
      >
        <StoredFilesProvider baseUrl={backendUrl} ownerId={""} ownerType={""}>
          {children}
        </StoredFilesProvider>
      </ShaApplicationProvider>
    </GlobalStateProvider>
  );
};
The applicationKey property value must match the app_key value you used in the backend migration (e.g., 'sample-publicportal'). Without this, the application will not be properly identified in the Shesha system. applicationKey is a valid, optional prop of ShaApplicationProvider (IShaApplicationProviderProps, shesha-reactjs/src/providers/sheshaApplication/index.tsx).
Step 5: Install Dependencies and Test
5.1 Clean and Install Dependencies
# Navigate to the new portal directory
cd publicportal

# Remove old node_modules and lock files (optional but recommended)
rm -rf node_modules package-lock.json .next

# Install dependencies
npm install
5.2 Run Development Server
npm run dev
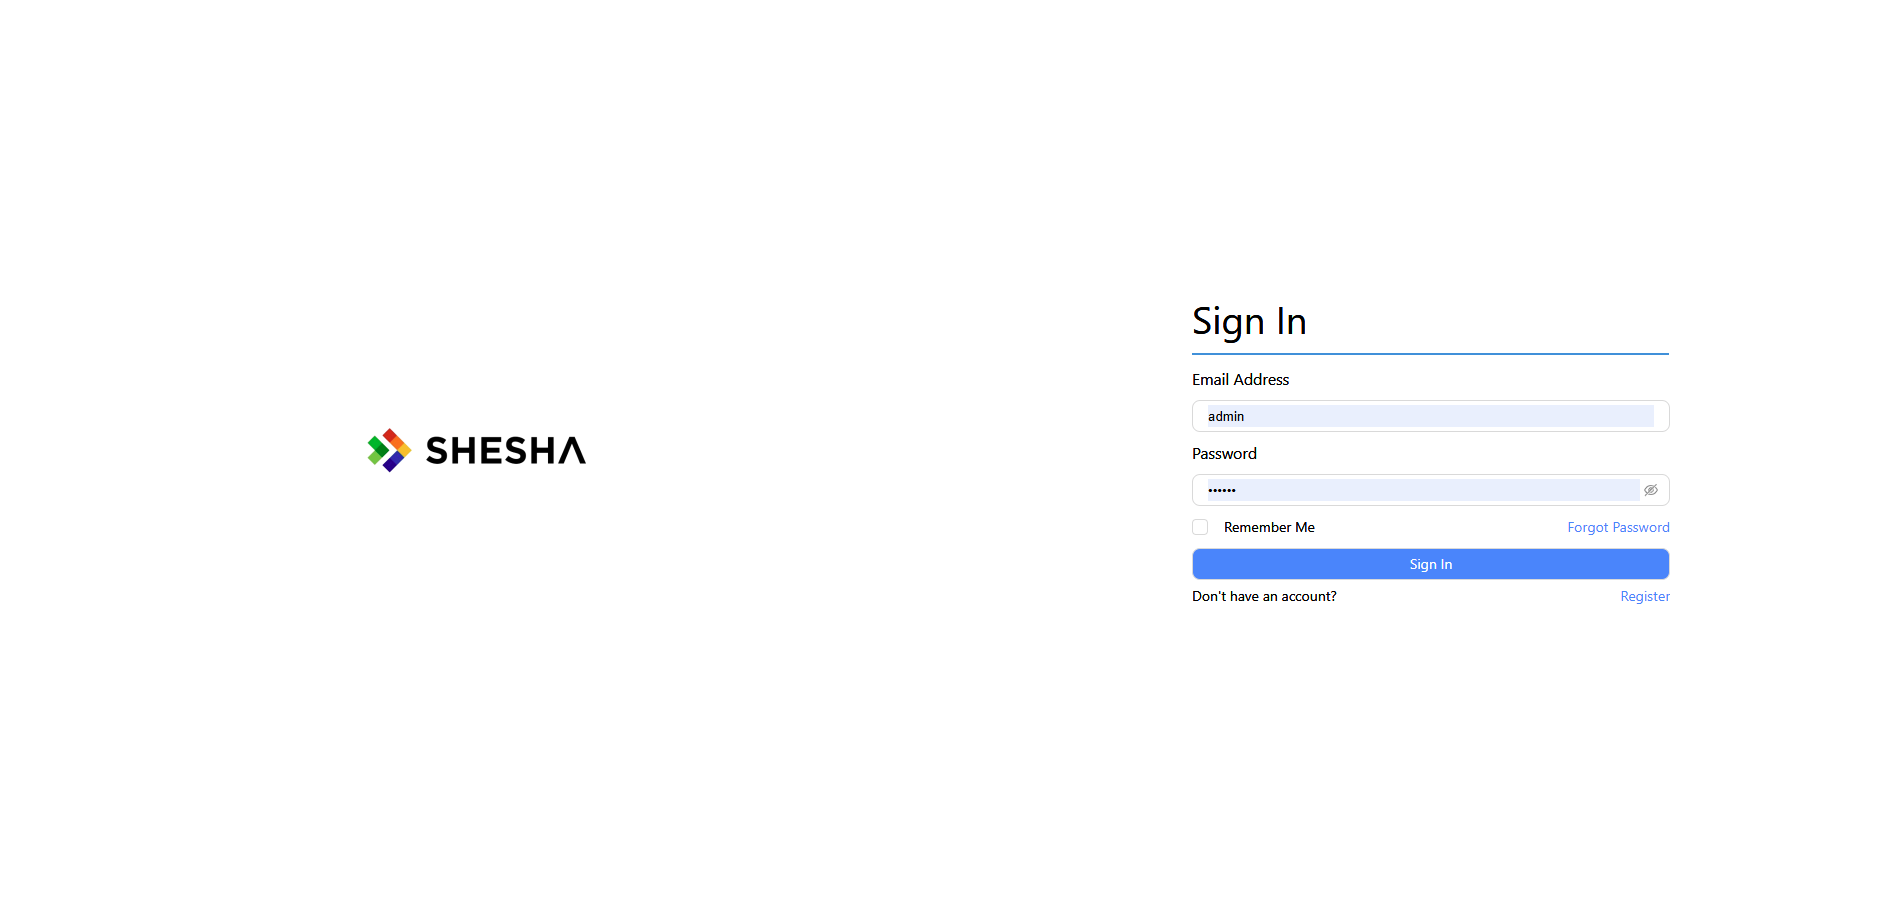
5.3 Verify in Browser
Open your browser and navigate to http://localhost:3000 (or http://localhost:3001 if using a different port)
You should see your new Public Portal application running.
5.4 Verify Application Key Registration
To confirm the application key is properly registered:
- Log into the backend database
- Run this query:
SELECT * FROM frwk.front_end_apps WHERE app_key = 'sample-publicportal';
You should see a record with:
- app_key:
sample-publicportal - Name:
Sample Public Portal - Description:
Sample public-facing portal application
If you don't see the record, ensure the migration ran successfully by checking the backend logs.
Additional Resources
Summary
You've successfully created a new frontend application in your Shesha project by:
- Duplicating the
frontendfolder topublicportal - Updating configuration files (package.json, app constants)
- Creating a FluentMigrator migration in
backend/src/Module/Sample.App.Domain/Migrations/to register the application key - Adding the
applicationKeyproperty toShaApplicationProviderinpublicportal/src/app/app-provider.tsx(critical step) - Installing dependencies and testing the new application
Your new frontend is now ready for customization and development!
Quick Reference Checklist
When creating a new frontend application named [portalname]:
- Duplicate
frontend→[portalname] - Update
package.jsonname field - (Optional) Update
src/app-constants/layout.tsto customize login form, header, footer, and layout - Create migration file:
backend/src/Module/Sample.App.Domain/Migrations/M[timestamp].cs - Set AppKey in migration to
'[portalname]'(lowercase, no spaces) - Update
src/app/app-provider.tsxto addapplicationKey="[portalname]"to ShaApplicationProvider - Run
npm installin the new portal directory - Start backend to apply migration
- Run
npm run devin the new portal - Verify application in browser
- Verify database record exists in the
frwk.front_end_appstable